How to Clean a Drip Coffee Maker for Better Coffee

Ah, the alluring aroma of freshly brewed coffee in the morning—it’s one of life’s simple pleasures for many of us coffee lovers. But as we zombie-walk towards the coffee maker, bleary-eyed and desperate for caffeine, when was the last time you pondered the cleanliness of the machine that produces your liquid energy?
It may seem trivial, but properly cleaning your drip coffee maker is crucial for optimizing the brewing process and enhancing the flavor of your morning cup of joe. Read on as we dive into the science behind coffee maker cleaning and provide a detailed, step-by-step guide to keeping your machine in pristine condition. Let’s get started.
Why You Need to Clean Your Drip Coffee Maker (YES, It’s Important!)
“But it’s just coffee, right?” you might be thinking. Well, hold onto your mugs, because that humble drip coffee maker deserves some TLC. Neglecting its cleanliness can be a one-way ticket to a coffee conundrum.
Coffee makers are breeding grounds for residue buildup, mineral deposits, and bacterial growth if not cleaned regularly. Here’s an overview of how these issues affect your machine’s performance and your coffee’s taste:
- Coffee oils and grounds accumulate: Each brewing cycle leaves behind small amounts of coffee residue. Over time, these residues coat the internal components of the machine. Not only does this affect the heating efficiency, but it also imparts bitter, rancid flavors as they continue to extract many times over. You may also experience some unpleasant acidity if they’re left to build up for too long.
- Mineral scale forms: Water naturally contains dissolved minerals like calcium and magnesium, especially if you live in an area with notably hard water. As water is heated inside your coffee maker, these minerals precipitate out forming solid mineral deposits known as scale. Scale buildup inhibits the flow of water and affects the heating ability. Since hitting the proper brewing temperature is pivotal for getting proper extraction and a nice balance of flavors, scale build up can totally ruin your coffee, leaving it underextracted and sour.
- Bacteria and mold grow: The warm, moist environment encourages microbial growth if you don’t clean the machine regularly. Bacteria and mold can produce unpleasant odors and flavors that transfer to your coffee, not to mention the fact that they’re potentially dangerous to consume.
- Efficiency and longevity decline: A dirty coffee maker has to work harder to brew coffee because the coffee residue and mineral build-up prevent everything from functioning smoothly. As a result, your coffee maker consumes more energy and experiences added strain on the pump and heating element. The buildup of residue can clog components and lead to deterioration over time, which shortens the lifespan of your machine.
So, if you’re aiming for a consistently great morning ritual, a clean coffee maker is your trusted ally and can mean the difference between a few more years of use and having to buy a new drip coffee maker.
How to Clean Your Drip Coffee Maker
Before we dive into the process of deep cleaning your coffee maker, let’s establish a daily cleaning routine. Think of it as a quick clean that you do every morning after making coffee, ensuring the machine stays in tip-top shape day in and day out.
Supplies needed:
- Damp towel or sponge
- Dish soap (optional)
- Baking soda (optional)
- Clean water
Step 1: Unplug and Cool Down
First things first, unplug your coffee maker. This might seem like a no-brainer, but safety comes first, as water and electricity don’t mix…or, they shouldn’t. Let the coffee machine cool down after use before starting to avoid burning yourself and potentially ruining your machine.
Step 2: Remove and Wash Removable Parts
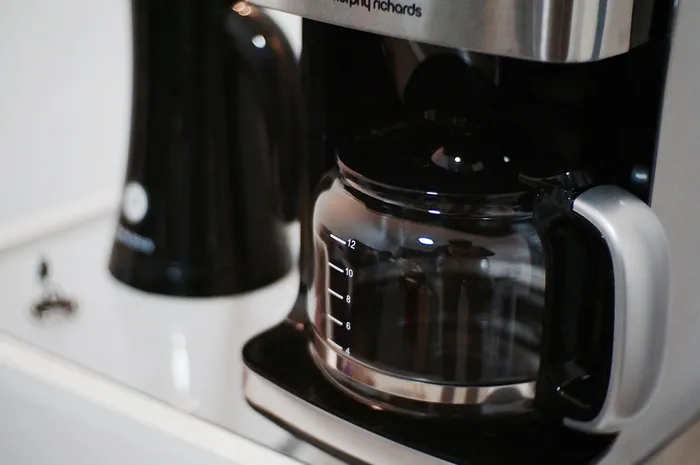
Most drip coffee makers have removable parts like the carafe, filter basket, and drip tray. Remove these components and give them a good rinse with warm, soapy water. This is essential to get rid of any lingering coffee oils and grounds. Don’t forget to wash the carafe daily; it’s a hotspot for coffee residue.
Also, rinse these components thoroughly to remove all soap residue. Specifically on the carafe, if soap remains on the bottom and then you put it back on the hot plate, you’re asking for a mess, bad odors, and potentially a ruined carafe.
Step 3: Clean the Exterior
While the other parts are drying, take a damp cloth or sponge and wipe down the exterior of your coffee maker. Pay close attention to any areas with dried coffee splatters or stubborn stains.
Double check to make sure the hot plate has fully cooled. Since this is a hotspot for burnt coffee residue, you should sprinkle about 1/4 teaspoon of baking soda on the plate and scrub it around with a damp cloth. The baking soda is lightly abrasive and should pull off any coffee residue. Once you’re done, wipe away the residue with your damp sponge.
Step 4: Dry and Reassemble
Make sure all the parts are dry before reassembling your coffee maker. This prevents moisture from building up inside the machine, which can lead to mold and a dank odor. Nobody wants that in their morning coffee. If your water reservoir or filter basket are still damp, just leave them open so that they have a chance to dry off.
Now that your coffee maker is looking spiffy on the outside let’s talk about how to keep its inner workings in top condition.
How to Deep Clean Your Drip Coffee Maker
Daily cleaning is a fantastic start, but occasionally, your coffee maker will need a deep cleanse to maintain peak performance and ensure that your coffee tastes as good as it should.
Why perform a deep clean? I’m glad you asked!
- Residue Buildup: Over time, coffee oils and mineral deposits accumulate in the inner components, affecting the flavor and brewing efficiency.
- Bacterial Growth: Neglecting deep cleaning can lead to bacterial growth on the inside, too, which is far from appetizing and potentially dangerous.
- Scaling: Mineral deposits, particularly calcium and magnesium, can build up over time, causing scaling that hinders the machine’s functionality and can impart weird flavors into your coffee.
Step 1: Descaling
Descaling is a vital part of deep cleaning your coffee maker, especially if you live in an area with hard water. Here’s how to do it:
Gather Supplies
You’ll need white vinegar and water in equal parts. Depending on your coffee maker’s size, you may need a couple of cups of this solution. You can also use a commercial descaling solution, but these don’t work any better than vinegar and water.
Begin the Descaling Process
Pour the vinegar and water solution into the water reservoir. Make sure your coffee maker is off and cool. Then, run a full brew cycle without any coffee grounds. This allows the vinegar mixture to circulate through the machine and break down mineral deposits.
This works because the vinegar is highly acidic, which breaks down the mineral deposits into salts and carbon dioxide, which then just get flushed out of the internal components.
Rinse
After the descaling cycle, run at least two cycles with clean water to remove any lingering vinegar odor and taste. Empty the carafe between each cycle. You don’t want to end up with vinegar-infused coffee!
Step 2: Clean the Filter Basket and Drip Tray
While your coffee maker is still apart, take a moment to scrub the filter basket and hot plate. Use warm, soapy water to get rid of stubborn coffee grinds and oils.
You can also use baking soda and a damp sponge to wipe away any dried-on coffee or stubborn stains. Just be sure to rinse the area thoroughly afterward.
Step 3: Clean The Carafe
The carafe can also collect stains over time. To remove them, mix a paste of baking soda and water and gently scrub the inside of the carafe. Rinse thoroughly.
You can also put some uncooked rice in the carafe, covering the top, and shaking gently for a minute or two. The hard rice is abrasive enough to chip away at dried coffee stains on the inside. Following the rice clean with a baking soda scrub is a good idea to make sure you got everything out.
Step 4: Reassemble and Brew
Once everything is clean and dry, reassemble your coffee maker. Brew a cycle with clean water to ensure there are no traces of vinegar or soap left. You don’t want your next cup to taste like a chemistry experiment. Feel free to taste the water that comes out to make sure it tastes clean and fresh.
How Often Should You Clean a Drip Coffee Maker?
The frequency of deep cleaning that’s appropriate for your coffee maker depends on a few factors:
- Water Hardness: If you live in an area with hard water, you might need to deep clean more frequently, perhaps every one to three months to remove mineral deposits from your machine. If you’re unsure about your water hardness level, you can check this water hardness map. A hardness of around 120 mg/L or higher means there’s a concern that your water will negatively affect your machine over time, so you should take additional precautions.
- Daily Use: If you use your drip coffee maker multiple times a day to fuel your caffeine addiction, it might need more regular deep cleaning. A weekly deep clean can work wonders if you use your machine to service multiple people every day, and it can make a big difference in your machine’s lifespan.
- Appearance and Taste: If your coffee maker starts showing signs of residue buildup or your coffee starts to taste off—usually overly bitter or acidic—it’s a clear sign that it’s time for a deep clean.
Also, don’t neglect the daily clean! You don’t eat off of plates more than once without washing them, right? (RIGHT?!) So don’t drink coffee from your coffee machine more than once without cleaning it! Simple as that.
Wrapping Up: Why a Clean Coffee Maker Makes Better Coffee
In the world of coffee, cleanliness isn’t just a virtue; it’s a necessity. A clean coffee maker doesn’t just ensure the longevity of your machine, it also leads to better coffee.
- Improved Flavor: When your coffee maker is free of residue, your drip coffee flavor shines through. No more bitter or off-putting notes from old oils and grinds.
- Consistency: Clean machines brew consistently. You’ll enjoy a consistently delicious cup of coffee each time without wondering why the last batch tasted fine and this one is borderline undrinkable.
- No Funky Odors: A clean coffee maker won’t harbor bacteria, and it won’t emit any unpleasant odors that could taint your coffee and potentially make you sick.
- Energy Efficiency: A well-maintained coffee maker operates more efficiently, saving you on energy bills and reducing your carbon footprint. It’s a nominal improvement, but still an improvement!
In a nutshell, if you want to keep enjoying your daily coffee bliss, show some love to your drip coffee maker. It’s a simple process that pays off in the form of delicious, piping-hot coffee every morning.
Wrapping Up: Why a Clean Coffee Maker Makes Better Coffee
In the world of coffee, cleanliness isn’t just a virtue; it’s a necessity. A clean coffee maker doesn’t just ensure the longevity of your machine, it also leads to better coffee.
- Improved Flavor: When your coffee maker is free of residue, your brew’s flavor shines through. No more bitter or off-putting notes from old oils and grinds.
- Consistency: Clean machines brew consistently. You’ll enjoy a consistently delicious cup of coffee each time.
- No Funky Odors: A clean coffee maker won’t harbor bacteria, and it won’t emit any unpleasant odors that could taint your coffee.
- Energy Efficiency: A well-maintained coffee maker operates more efficiently, saving you on energy bills and reducing your carbon footprint. It’s a nominal improvement, but still an improvement!
In a nutshell, if you want to keep enjoying your daily coffee bliss, show some love to your drip coffee maker. It’s a simple process that pays off in the form of delicious, piping-hot coffee every morning.
Frequently Asked Questions
How often should I deep clean my drip coffee maker?
Deep cleaning frequency depends on factors like water hardness and daily use, but in general, aim to deep clean your coffee maker every one to three months. If your area has hard water or you use the machine daily, you might want to lean towards the shorter end of that range. Keep an eye out for any signs of residue buildup or changes in the flavor of your coffee – these are surefire indicators that it’s time for a deep clean.
Can I use other cleaning solutions instead of vinegar for descaling?
Yes, you can use commercial descaling solutions specifically designed for coffee makers. These are often citric acid-based and work effectively to remove mineral deposits. Some people also use a mixture of lemon juice and water as an alternative to vinegar. Just make sure to follow the manufacturer’s instructions or the recommended dilution ratios for the specific solution you choose.
Is it safe to put the removable parts of my coffee maker in the dishwasher?
In most cases, yes, it’s safe to put removable parts like the carafe, filter basket, and drip tray in the dishwasher, but it’s best to check your coffee maker’s manual for specific recommendations. Generally, these parts are dishwasher-safe, but hand washing with warm, soapy water is a gentler option, especially if there are delicate components or sensitive finishes.
Can I use a cloth or sponge to clean the interior of my coffee maker?
Cleaning the interior of your coffee maker with a cloth or sponge is not recommended, as it’s difficult to reach all the nooks and crannies. Instead, rely on the vinegar or descaling solution for deep cleaning. For daily maintenance, focus on the removable and easily accessible parts like the carafe and filter basket. These are the areas where coffee oils and grinds tend to accumulate most, and you should clean them regularly to maintain the overall cleanliness of your coffee maker.