Keurig Leaking Water When Preheating: How to Fix the Problem

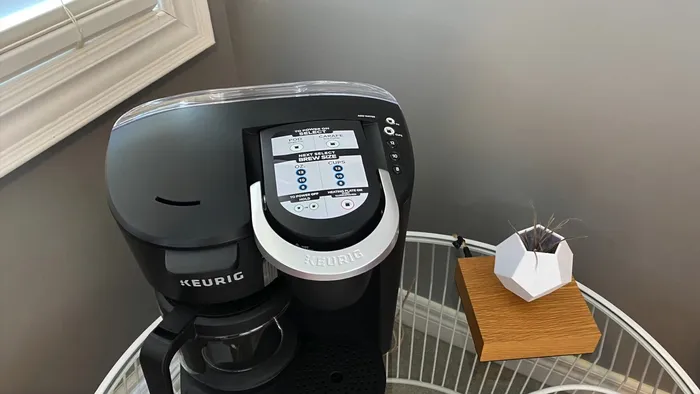
Keurig coffee makers are prized for their convenience. They simplify the coffee-making process by using K-cups, eliminating the need for a deep understanding of coffee brewing. However, it can be frustrating when your Keurig machine unexpectedly starts leaking and requires troubleshooting.
One of the common issues encountered with these machines is the Keurig leaking during preheating. In this article, I’ll discuss why this problem occurs and offer some solutions to address it once and for all.
Understanding the Leakage Issue
In order to understand the causes of leaking in your Keurig machine, it’s essential to have a basic understanding of how these devices operate.
When you insert a K-cup into the machine and close the lid, a few different needles puncture the cup. The number of needles varies depending on the model, ranging from one to five piercing the top to allow hot water to enter the K-cup. Additionally, one needle punctures the bottom of the pod to enable brewed coffee to exit into your cup.
Water is directed through the upper needles into the coffee grounds inside the K-cup. If any issue disrupts this process, the water may leak out prematurely through the machine.
Keurig machines utilize a water pump to push water through the K-cup, a different approach than most drip coffee makers that rely on the natural flow of heated water. The increased pressure coming through the top needle could be a factor contributing to leakage.
Now, let’s explore the primary reasons your Keurig machine might leak during preheating.
1. Broken or Misaligned Upper Gasket
A common cause of leakage during preheating is a malfunctioning upper gasket. This gasket is crucial in maintaining pressure within the coffee pod after it’s punctured. If it’s misaligned or damaged, the pressure escapes, causing water to leak out through the top of the K-cup before reaching the coffee grounds.
That water then drips through the machine and may give the impression that the Keurig machine itself is leaking during preheating.
To rectify this issue, you can check the upper gasket by inspecting the rubber piece around the needle on the underside of the machine’s lid (the part that you lift up to load a K-cup). If it’s visibly misaligned, you can use tweezers to reposition it correctly. If the gasket is damaged or loose, you’ll need to replace it.
You can find replacement gaskets online, typically priced between $5 and $10. You should get a few of them for that price. Honestly, the cost is insane for what the actual gasket is, but it’s far more affordable than replacing your entire Keurig machine.
2. Broken Hose or Valve Inside the Machine
If your Keurig machine is leaking during preheating, you may also have a damaged hose or valve within the machine. Keurig machines pressurize the water as it enters the K-cup, facilitated by a water pump. If any component of this system malfunctions, water may not flow as intended and may instead leak through the machine.
Unfortunately, repairing a broken hose or valve is a complex task, and it is not recommended as a do-it-yourself project. If you suspect this is your issue, you should check to see if your machine is still under warranty. If it is, contact customer support for assistance. If not, you might benefit from hiring a small appliance repair tech. Otherwise, you’ll have to replace your entire Keurig coffee machine.
3. Clogged Machine
Clogs are another common culprit of water leaking out of Keurig machines. Even though K-cups have internal filters, any issues with the filter sealing against the K-cup’s inner walls can lead to coffee grounds obstructing the lower needle that punctures the cup’s bottom. In such cases, water cannot pass through properly and may leak out prematurely.
To address this problem, unplug the machine and remove any K-cup present. You should be able to locate the two needles inside the machine - one at the top and one at the bottom. Use a safety pin or needle to clear any obstructions in these needles by inserting and removing it several times. You may need to repeat this process a few times to ensure a permanent fix.
After you clear the needles, you can try running a cup of just water through by inserting a reusable K-cup without coffee grounds in it. This should clear away any remaining remnants.
4. Scale Build-Up
Mineral deposits from tap water can accumulate inside Keurig machines over time. Neglecting the “descaling” notification—let’s be honest…we all do it—can lead to mineral build-up that restricts water flow. This is especially an issue if you have hard water, which contains high levels of calcium and magnesium that can build up inside your machine.
Over time, this restriction can result in water accumulating within the K-cup and leaking from the top.
To address scale build-up, follow the manufacturer’s guidelines for descaling your machine. You can use a Keurig descaling solution or a water and white vinegar mixture. This process may need to be repeated several times to remove the build-up entirely.
5. Overfilled Water Reservoir
An easy-to-overlook issue that can cause leakage is overfilling the water reservoir. If it’s filled beyond capacity, water may spill over when the reservoir is reconnected, creating the appearance of a preheating leak.
To prevent overfilling, simply avoid…well…overfilling the reservoir. If overfilling has already occurred and the machine is leaking, you can run the machine once or twice to reduce the water level to a proper amount. Then clean up any leaking water.
Preventive Measures to Avoid Leakage
Preventing leaks is often simpler than fixing them after they occur. Here are some tips to keep your Keurig machine leak-free:
- Regularly descale your Keurig machine to maintain proper functionality.
- Replace the water filters in your Keurig as recommended to prevent mineral buildup and improve the taste of your coffee.
- Practice regular maintenance by cleaning your machine every three months to remove any stray coffee grounds and debris that may contribute to clogs and leaks.
By following these steps, you can ensure a consistent, trouble-free coffee experience with your Keurig machine.
Frequently Asked Questions
How often should I descale my Keurig coffee machine?
How often you should descale depends on the hardness of your water, but, in general, you should aim to descale your Keurig every 6 months. If you have hard water, descale every 3-6 months; if you have soft water, you can extend it to 6-12 months. Descaling prevents mineral buildup, which can clog the machine and affect the taste of your coffee. Follow Keurig’s guidelines and use a Keurig descaling solution or a mixture of water and white vinegar. Make sure to rinse your machine thoroughly with plain water after descaling to eliminate any lingering taste of vinegar.
How can I clean the needles in my Keurig machine?
To clean the needles in your Keurig machine, first unplug the machine and remove any K-cups. Locate the needles—one at the top and one at the bottom inside the machine. Use a safety pin or needle to clear any obstructions by inserting and removing it multiple times. This process should dislodge any coffee grounds or debris that may have accumulated. For a thorough clean, repeat these steps a few times, ensuring that water flows freely through the needles before resuming regular use.
Can I use tap water in my Keurig, or is filtered water better?
While you can use tap water in your Keurig, filtered water is recommended. Tap water may contain minerals that can build up over time, leading to clogs and affecting the taste of your coffee. Using filtered water helps reduce these issues and maintains the machine’s longevity. Some Keurig models come with water filters that should be replaced periodically but help reduce mineral build up from tap water. Alternatively, you can use filtered or bottled water to ensure the best-tasting coffee and minimize maintenance needs.