Keurig Troubleshooting: Fixing Common Keurig Issues

Nothing quite wakes you up in the morning like a fresh cup of coffee…but nothing can drag you down as much as early-morning Keurig troubleshooting. Keurigs are popular mostly because they’re convenient, but when your machine starts acting up, it can put a real damper on your morning.
Not to worry—in most cases, Keurig issues can be easily diagnosed and fixed at home without having to pack up and ship off your machine. In this guide, I’ll walk through the most common Keurig troubleshooting problems I’ve encountered over the years and provide some tips on how to get back to your morning routine.
Common Keurig Issues and How to Fix Them
Here’s a rundown of typical issues that can arise with Keurigs, along with steps you can take to get them back in working order.
Keurig Machine Won’t Turn On
It’s always frustrating when your Keurig won’t power up at all, and, unfortunately, this is usually due to some usually serious issue with the mechanical components. However, there are some things you can check for yourself before throwing in the towel and buying a new Keurig machine.
- Check that it’s plugged in. I know, I know…BUT…if this is the issue, you can quickly get off of this article and pretend it never happened. I won’t tell.
- Loose power cord. Make sure the power cord is firmly plugged into both the outlet. If your Keurig has a detachable cord, check that it’s sitting firmly in your machine, too. Unplug it and plug it back in to reseat the connection.
- Faulty outlet. Try plugging something else into the outlet like a lamp to see if it’s getting power. If not, the issue is with your outlet, not the Keurig.
- Blown fuse. Check your electrical panel for any tripped breakers or blown fuses and reset or replace them if needed. These are common in the kitchen where you have electrical components around water. If you have GFI outlets, make sure those weren’t tripped. Just hit the “TEST” button and then the “RESET” button and try again.
- Damaged power cord. Inspect the power cord for damage. Fraying, cuts, or exposed wires can prevent power from getting to the machine. You’ll have to replace cords that look faulty.
- Internal electrical issue. Unfortunately, the most common issue here is a problem with the internal components. If the outlet is supplying power but the Keurig still won’t turn on, there may be an internal electrical problem with the wiring or control board. Contact Keurig support if you’re still under warranty. If not, you’ll probably have to replace your machine or call for repairs.
Keurig Makes a Lot of Noise When Brewing
Keurigs tend to make some noise when brewing, but excessive grinding, buzzing or rattling could indicate an issue. And it’s not just a problem with waking other family members up first thing in the morning…it could indicate that your machine is about to break down. Here are some things to check:
- Remove and reseat the K-Cup pod. It may not have seated properly, which could cause a problem with the needles piercing or feeding water into your K-cup.
- Descale the machine. Mineral buildup can cause vibrating and rattling, and it can also cause a slew of other issues. Plus, it puts excess wear on your Keurig and limits its lifespan.
- Check water level. Too little water can make the pump strain. Top off the reservoir up to the max fill line to see if that’s the problem.
- Clear air in the water line. Lift the water reservoir off of the machine, and then put it back on and take it off a few times in a row, rapidly. You should see bubbles coming up from the bottom if this was the problem.
- Ensure the brew head, pod holder and puncturing needles are clean. Calcium deposits or coffee grounds stuck in these parts can increase noise. Give your Keurig a good cleaning and descaling to clear away any debris.
Keurig Leaking from the Bottom During Preheating
Having hot water dribble from underneath your Keurig before brewing is pretty common but can still be alarming. I’ve seen this issue a handful of times, and luckily, there are a bunch of things you can do, one of which should fix the problem.
- Scale buildup in the needle. One of the most common issues that causes a Keurig to leak is scale build up. Mineral scale or old grounds may be blocking the lower outlet needle, which causes your coffee to build up in your K-cup and spill out the top. Descaling and cleaning the needles should help.
- Misaligned needles. The top and bottom needles in the brew head are pretty fragile, and they can easily get bent or misaligned. Check them for both issues. You can buy replacement needles for a few dollars on Amazon or directly from Keurig.
- Misaligned needle gasket. The upper needle that pierces the foil in your K-cup has a small rubber gasket around it that creates a seal with the foil when brewing. If that’s misaligned, broken, or missing, water can spill out the top of your K-cup and dribble down through your brewer. Get a flashlight and check to make sure the gasket is there and seated properly. If not, you can get a replacement online.
- Worn brew head gasket. The rubber gasket around the bottom of the brew head seals water inside as well. If brittle or cracked, it can leak. Contact Keurig for a replacement gasket.
- Damaged internal tubing. If the above solutions don’t fix the issue of your Keurig leaking during preheating, there could be a puncture or rupture in the internal tubes. I recommend having Keurig service the machine. You can also buy replacement tubes online. In my experience, they’re pretty easy to swap out. You’ll just need a screwdriver to get into your machine, and a set of new tubing.
Keurig Won’t Brew Coffee
A Keurig that turns on but just won’t brew is endlessly frustrating. Start troubleshooting with these steps:
- Add water. Another thing that might seem obvious, but at 6am, no one would blame you for missing this one. Make sure the reservoir isn’t empty. Even if the add water light isn’t on, try topping it off.
- Descale the machine. The most common reason a Keurig won’t brew is mineral buildup clogging tubes or the puncture needle. Run a thorough descaling to get your machine up and running again.
- Clean the K-cup holder. Ground coffee stuck in the holder base can prevent a pod from seating properly to puncture and brew. Brush out the holder and put in a fresh K-cup.
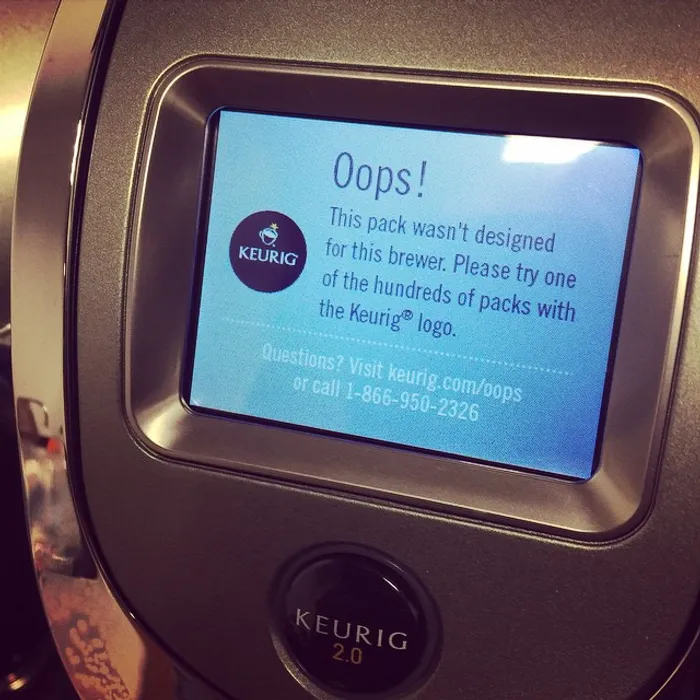
- Incompatible K-cup. If you buy off-brand K-cups, there’s a chance your brewer will reject them if you have a Keurig 2.0 machine. Try putting in a Keurig-branded K-cup to see if that works. If it does, the ones you purchased might just not work with your machine.
- Inspect the puncture needles. Ensure the needles in your brew head aren’t bent or clogged, and check to make sure the gasket around the top needles is seated properly. Soak the needles in vinegar or replace if needed.
- Reset your Keurig. Sometimes…the old IT trick of turning it off and turning it on again is all you need. Unplug the machine for a full minute to reset the internal computer, then plug it back in.
- Check for kinks or obstructions in the water line and outlet tube. Refill the reservoir and listen for the pump humming as it tries to flow. If it doesn’t turn on, your water pump might be worn out.
- Check the heating element. Did you notice your Keurig coffee not getting as hot as it used to before your machine stopped brewing altogether? The heating element might be burnt out, which would prevent your Keurig from brewing because the thermometer never reads that it’s hot enough. You’ll probably need professional service for this issue.
Keurig Coffee Tastes Strange
Funny flavors in your coffee can be off-putting, but there’s usually some underlying reason for them. Some causes and remedies include the following:
- Clean the machine. Run water through on the highest brew size with no pod to flush old coffee oils and stale water. Consider using a cleaning solution, as well, or a descaler to get all of the gunk out.
- Descale. Speaking of descaler, mineral buildup alters brewing temps and extraction, giving an unusual taste. If your coffee isn’t as good as it used to be and you have been ignoring the “It’s time to descale your brewer” message for months like everyone else does, this could be the problem.
- Replace your water filters. Change carbon filters every 2 months for fresher water flavor if your Keurig machine’s reservoir takes filters. If not, consider using bottled water or pre-filtered water in your machine.
- Clean the pod holder. Rancid oils from old grounds sticking to the needle can impart bad flavors in your coffee. Open up the pod holder and give it a good scrubbing. Just be careful not to cut yourself on the needles.
- Don’t reuse pods. The foil tops are hard to clean and re-seal. Plus, old grounds in used pods taste stale, so avoid this at all costs. If you’re looking to save money or reduce strain on the environment, consider getting a reusable K-cup.
- Avoid oily beans. Speaking of using a reusable K-cup, if you are using one, steer clear of dark roasts. Dark roasts have more abundant natural oils that go rancid over time if they build up in your machine. Stick to medium roasts in K-cups.
- Cook away from your Keurig machine. If your coffee tastes like last night’s dinner, consider moving your machine away from your stove. Brew away from strong spices, foods, or scents which can get drawn into the Keurig.
Keurig Isn’t Heating Up
Keurig machines don’t usually hit the desired brewing temperature, but sometimes they don’t even come close to the 180 to 190 degrees they normally hit. Getting your Keurig to heat up properly is key to a good cup of coffee. Here are some steps to try if your Keurig isn’t heating the water hot enough.
- Give it time. When using the Keurig in cooler conditions like a cold kitchen early in the morning, allow several minutes for the machine to preheat the water before brewing. Brew a cup of hot water through the machine first to help it heat up faster.
- Check the power supply. Make sure your Keurig is plugged firmly into a grounded outlet that you know works, and that the outlet provides the proper voltage listed in the Keurig’s specifications. Use a voltmeter to check the outlet voltage if unsure.
- Descale. Yep…scale build up really can cause all of these problems! Mineral scale buildup along the internal heating element can act as insulation that prevents proper heat transfer. Run a descaling solution through the Keurig every three to six months to remove any limescale.
- Reset your machine. Unplug the power cord from the wall outlet for 1 full minute before plugging back in. This resets the computer and allows a fresh boot up that may fix heating issues caused by glitches.
- Replace heating element. With regular daily use over several years, the metal heating coil inside the Keurig can wear out or corrode, preventing efficient heating. Contact Keurig customer service to diagnose the issue and ship a replacement heating element if needed. You might also want to consider upgrading that old Keurig to a newer model, or…maybe it’s time for a Nespresso machine?
- Replace internal wires. Internal power wires connected to the heating element can become cracked or frayed over time. This prevents full wattage from reaching the heating coil. Have Keurig service open up the machine to inspect and replace any deteriorated wires.
Keurig Lights Are Blinking
The various indicator lights on your Keurig blinking on and off can signal a few different issues. Pay attention to any lights that are blinking or flashing abnormally when troubleshooting problems. Here are some tips for decoding the meaning behind common Keurig indicator light codes.
- Add Water light. Even if the water reservoir appears full on visual inspection, the electronic water level sensor inside may need priming and resetting. Slowly fill the water tank all the way up to the max fill line indicated on the reservoir to reset the sensor fully.
- Descale light. A flashing descale indicator light means the machine is detecting mineral scale buildup inside the internal tubes or heating element. To clear the descale light, run 2-3 cycles of diluted white vinegar — in a 1:1 ratio with water — through the Keurig on the largest brew size. Let the vinegar sit for a few hours as well to dissolve scale. You can also use a store-bought descaler.
- Auto Off light. The Auto Off light blinking indicates the Keurig has powered down automatically into standby mode after sitting idle for over 2 hours without use. This is a power-saving function. Simply press the power button again to turn the coffee maker back on.
- No Pod light. The No Pod indicator light comes on when the K-cup pod holder is empty or does not have a pod inserted properly. Make sure to insert a pod fully into the holder to trigger the sensor and reset the light. Some pods are just faulty, so try another one, and make sure to switch to a different brand to see if that fixes the problem.
- Brew/Heat light blinking. A blinking brew/heat light typically signals the Keurig is still in the preheating process and is warming up the water. Give the machine a few extra minutes to fully preheat before brewing, especially if in a colder room. Descaling can speed up heating, as well.
- All lights flashing. If all indicator lights start flashing simultaneously, this often indicates an internal electronics or control board error. Unplug the power cord from the wall for 1 minute, then plug back in to force a hard reset of the computer processor inside the Keurig. Contact support if the error persists after a reset.
Keurig Makes Too Much or Too Little Coffee
Getting just the right amount of coffee in your cup can be tricky with a Keurig. If it brews too little or too much, try the Keurig troubleshooting tips below.
- Too little coffee. Make sure the brew size setting on your Keurig is not configured for a small 4 or 6 oz cup. Adjust the setting up to a larger 10, 12, or 14 oz brew size as desired. This allows more water and coffee to flow.
- Too little coffee. The outlet needle that punctures the pod could be partially clogged with rancid coffee oils or mineral scale. Carefully detach and soak the entire needle assembly in undiluted white vinegar to dissolve buildup.
- Too little coffee. Heavy limescale accumulation in the Keurig’s internal tubes can restrict water flow. Run a few cycles of descaling vinegar solution through to clear any mineral blockages.
- Too much coffee. If dry pods are getting overfilled and overflowing the holder, remove them carefully when wet to avoid puncture needle damage. The foil lid may not have punctured cleanly.
- Too much coffee. Check that the puncture needle is straight. If bent, it may stay pushed up allowing overflow. Gently bend the needle back into proper vertical alignment before reinserting.
- Too much coffee. The K-cup pod should sit flat and evenly inside the holder. If at an angle, pick it up off the needle and spin the pod gently to reseat it properly for clean puncturing.
Keurig Grounds in Cup
Finding wet coffee grounds in your Keurig coffee is unpleasant. Take these steps to keep grounds out of your Keurig coffee.
- Inspect K-cups. Visually inspect all sides of K-cup pods before brewing. Make sure there are no small tears, holes or gaps in the foil cover that could allow grounds to escape into your cup. Also check for damaged plastic, as that can happen during shipping.
- Clean the pod holder. Rancid coffee oils allow damp grounds to cling to the pod holder. Wipe out the holder thoroughly with a damp cloth after each use to remove any residue.
- Descale the machine. Back to ol’ reliable! Heavy limescale buildup inside the Keurig’s water lines can restrict or misdirect water flow in ways that cause grounds to discharge into the brewed coffee.
- Use proper pod sizes. Certain Keurig models require specific cup dimensions to align properly. Using unsupported 3rd party pods with incorrect dimensions can lead to overflow or malfunctions that release grounds into your cup.
Keurig Keeps Shutting Off During Brewing
A Keurig that repeatedly turns off mid-brew typically points to an overheating issue. There are some things you can try, but, unfortunately, this is usually indicative of a more severe Keurig problem that will require replacement or professional repair.
- Make sure your Keurig isn’t blocked on all sides. Ensure the machine has several inches of clearance on all sides for ventilation. Don’t enclose it in a cabinet while it’s brewing.
- Descale. I feel like a broken record at this point, but…hopefully the point is getting across. Mineral scale buildup prevents proper heat dissipation. Descale your Keurig machine every three to six months, and consider doing a dedicated descale if your Keurig keeps shutting off.
- Small batches. Brewing fewer than 6 oz can trip the auto-off thermal switch. Make sure there’s enough water in your reservoir before brewing to avoid this issue.
- Brewing nonstop. Let the machine fully cool down between brew cycles. Don’t brew back-to-back if you can avoid it, especially on hot days. Your machine might include an auto shut-off feature to shut things down if the internal components are at risk of melting or getting too hot.
- Blown motor. A worn brewer motor can overwork and overheat. This usually only happens in older machines, but you could have Keurig diagnose the issue if you don’t want to replace it entirely.
Keurig Shoots Coffee Grounds Everywhere
Having piping hot wet grounds explode out of your Keurig is alarming and…just really inconvenient to have to clean up first thing in the morning. Trust me…I know. Here’s how to avoid it:
- Insert pod slowly. Jamming in a pod too forcefully can misalign the cup or puncture needle, which can prevent proper brewing and cause too much pressure to build up in the K-cup. Gentle insertion prevents messes.
- Inspect the needles and upper gasket. Bent or damaged needles can spray water haphazardly within the brew head. Replace puncture needles whenever you notice they’re damaged.
Wrapping Up: Fixing Common Keurig Problems
While modern Keurigs are fairly reliable, they can develop quirks and issues over time just like any small appliance. Following the Keurig troubleshooting tips in this guide should help diagnose and remedy a wide range of common problems.
With a bit of TLC and quick troubleshooting when problems arise, your Keurig can continue brewing convenient coffee morning after morning. Just be sure to keep your owner’s manual handy so you know what all the blinking lights mean!
Frequently Asked Questions
Why does my Keurig brew very slowly?
Keurigs brewing slowly usually comes down to buildup inside the machine. Hard water mineral scale or old coffee oils can partially clog the internal tubes and needle, restricting water flow. Run white vinegar or a descaler through on the largest brew size to descale the machine fully. Also, inspect and clean the brew head and pod holder thoroughly. Replace the puncture needle if it appears corroded or bent.
My Keurig shuts off immediately after turning on. How do I fix this?
If your Keurig powers on but shuts off instantly, there is likely an internal electrical issue. This immediate shutdown is a safety mechanism to prevent damage. Try unplugging the machine for 1 full minute then plugging it back in to reset. If it continues shutting off right away, there is probably a faulty wire connection or component on the control board. Contact Keurig customer service; they can walk you through diagnosing the specific part that needs replacement.
The clock on my Keurig is flashing. What does this mean?
A flashing clock or clock displaying the wrong time is typically caused by a power outage. Keurigs with digital clocks will blink and reset to 12:00 when they lose power. Turn the machine off and back on again to reset the clock. You will need to re-enter the correct time in the machine’s menu settings.
There is brown water coming out of my Keurig - what should I do?
Brown or discolored water from your Keurig means there is likely old coffee residue or scale built up inside the internal tubes and hoses. Mineral scale and rancid coffee oil can begin flaking off into the water. Run 2-3 cycles of heated white vinegar or a commercial descaler through the machine, and let it sit for a few hours too. This should fully dissolve and flush out any buildup. Replace the water filter if equipped. Use filtered water to prevent scale in the future.