What Is the Inverted AeroPress Method?

The inverted AeroPress method is a unique way of brewing coffee using the AeroPress that has become extremely popular among coffee enthusiasts. Unlike the traditional AeroPress brewing method, the inverted method involves flipping the AeroPress upside down during the brewing process. This allows for a longer steeping time and more control over the final product.
In this comprehensive guide, we’ll dive deep into the inverted AeroPress method, exploring its basics, steps, tips, and how it compares to the regular AeroPress brewing method.
AeroPress Inverted Basics
The inverted AeroPress method was developed by coffee enthusiasts who wanted more control over their AeroPress brewing process. The main reason for using the inverted method is to prevent coffee from dripping through the filter before the desired steeping time has elapsed.
In the regular AeroPress method, you place the filter and cap on the bottom of the AeroPress, add your ground coffee, and then pour in your hot water. However, as soon as you add the water, some of the coffee begins to drip through the filter and into your mug. This premature dripping can lead to under-extracted coffee and a weaker flavor. And it’s just less precise overall since you can’t control how much water seeps through before you press the plunger.
By flipping the AeroPress upside down, you can let your coffee steep for as long as you like without any premature dripping. This gives you more control over the extraction process and allows you to achieve a fuller, more robust flavor.
Benefits of the Inverted AeroPress Method
- Longer Steeping Time: The inverted method allows you to steep your coffee for as long as you like, giving you more control over the extraction process and resulting in a fuller flavor. Using the inverted method makes the coffee more similar to using a French press.
- No Premature Dripping: By flipping the AeroPress upside down, you prevent any coffee from dripping through the filter before you’re ready to press.
- Easier to Stir: With the inverted method, you can stir your coffee more easily without worrying about any liquid escaping through the filter.
- More Consistent Results: Because you have more control over the steeping time and the amount of water used, the inverted method can produce more consistent results from brew to brew.
Inverted AeroPress Steps
Now that you understand the basics of the inverted AeroPress method, let’s walk through the steps of brewing coffee using this technique.
- Assemble Your Equipment: You’ll need an AeroPress, a filter, ground coffee, hot water, a stirring utensil, and a mug.
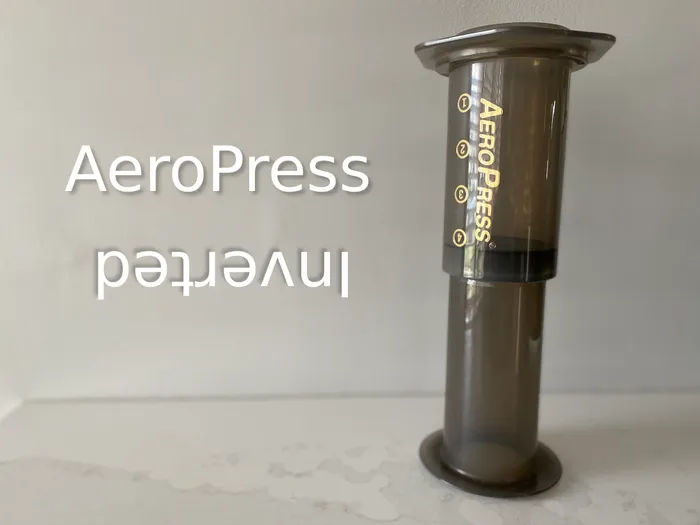
- Insert the Plunger: Insert the plunger into the brewing chamber just enough to create a seal. The numbers on the side of the AeroPress should be facing you. I usually keep the plunger halfway between the four and the top.
- Invert the AeroPress: Flip the AeroPress upside down so that the numbers are now facing downward and the opening of the brewing chamber is facing upward.
- Add Your Coffee: Add your ground coffee to the inverted AeroPress. For a standard 8-ounce cup, I recommend using about 15-18 grams of coffee.
- Add Hot Water: Pour hot water (between 195-205°F) over the ground coffee. Most recipes call for filling the AeroPress to the top, which is about 230 milliliters of water. I use 205°F water for light and medium roasts and drop it to 195°F for dark roasts.
- Stir: Stir the slurry to ensure that all of the coffee grounds are fully saturated. I stop once I no longer see any dark patches, usually after about 5-10 seconds.
- Attach the Filter: Place a filter into the filter cap and rinse it with hot water to remove any paper taste. Then, screw the filter cap onto the top of the AeroPress.
- Steep: Let the coffee steep for 1-2 minutes, depending on your taste preferences. A longer steep time will result in a stronger, more full-bodied flavor. This is my preferred steep time and matches my grind size. You’ll have to experiment to get the right combination of grind size and steep time. You should steep the coffee longer for coarser grinds and shorter for finer grinds.
- Flip and Press: Carefully flip the AeroPress over onto your mug. Apply steady pressure to the plunger and press down evenly until you hear a hissing sound, which indicates that all of the liquid has been expelled. Don’t press all the way until you compress the puck! Stop as soon as you start to hear air escaping from the brew chamber.
- Enjoy: Remove the AeroPress from your mug, discard the used coffee grounds and filter, and enjoy your freshly brewed coffee!
AeroPress Inverted vs Regular
You might not think that flipping the AeroPress upside down makes much of a difference, but it does. The difference between the taste and texture of the coffee you get from the inverted method is stark enough that I think of it as a completely different brewing method. Here’s why.
Flavor and Mouthfeel
One of the main differences between the inverted and regular AeroPress methods is the flavor and mouthfeel of the resulting coffee. Because the inverted method allows for a longer steeping time, it tends to produce a fuller, more robust flavor. The longer the coffee steeps, the more time the water has to extract the various flavor compounds from the grounds.
The inverted AeroPress method makes coffee that is much closer to the character of French press coffee. The paper filter removes enough oil and fine particles to make it significantly cleaner than French press coffee, but you can actually get very similar results if you use a reusable AeroPress filter instead.
In contrast, the regular AeroPress method can sometimes result in a slightly thinner, less full-bodied flavor due to the shorter steeping time and premature dripping. However, some coffee drinkers prefer the lighter, brighter flavor that the regular method can produce.
Texture
Another difference between the two methods is the texture of the final product. The inverted method often produces a slightly thicker, more syrupy texture due to the longer extraction time. This can be particularly noticeable if you use a fine grind size and a longer steeping time.
The regular AeroPress method, on the other hand, may produce a slightly thinner texture, especially if you use a coarser grind size and a shorter steeping time. However, the texture of your coffee will also depend on other factors such as the type of coffee beans used, the roast level, and the water temperature.
Control and Consistency
As mentioned earlier, one of the main advantages of the inverted AeroPress method is the increased level of control it provides over the brewing process. By flipping the AeroPress upside down, you can prevent any premature dripping and control the steeping time more precisely. This can lead to more consistent results from brew to brew.
The regular AeroPress method, while still offering a good level of control, maybe slightly less consistent due to the potential for premature dripping and a shorter steeping time. However, many coffee drinkers still prefer the regular method for its simplicity and ease of use.
Inverted AeroPress Tips
If you’re new to the inverted AeroPress method, here are a few tips to help you achieve the best possible results:
- Use a Coarse Grind Size: Because the inverted method allows for a longer steeping time, you can use a coarser grind size than you would with the regular method. This will help to extract different flavor compounds from your coffee grounds.
- Experiment with Steeping Time: The optimal steeping time for the inverted method will depend on your personal taste preferences and the grind size you use. Start with a 1-2 minute steep time and adjust your grind accordingly based on how the coffee tastes. A longer steep time will produce a stronger, more full-bodied flavor.
- Be Careful When Flipping: One of the main challenges of the inverted method is flipping the AeroPress over onto your mug without making a mess. To avoid spills, make sure to create a tight seal between the filter cap and the brewing chamber before flipping. You may also want to practice flipping the AeroPress over the sink a few times until you get the hang of it. Trust me, it’s worth it to practice. I have the burns to prove it.
- Rinse Your Filter: To avoid any paper taste in your coffee, be sure to rinse your filter with hot water before brewing. This will also help to preheat your mug and ensure a consistent brewing temperature. Rinsing the filter is a bit more challenging with the inverted method since you have to hold the cap with the filter in it. As long as you pour slowly you should be fine.
- Experiment with Water Temperature: The ideal water temperature for AeroPress brewing is between 195-205°F. However, you may want to experiment with slightly lower or higher temperatures to see how it affects the flavor of your coffee. I use hotter water for light roasts and cooler water for dark roasts.
Wrapping Up
The inverted AeroPress method is a popular and effective way to brew delicious coffee at home. By flipping the AeroPress upside down during the brewing process, you can achieve a longer steeping time, fuller flavor, and more consistent results. While the inverted method may take a bit of practice to master, it’s well worth the effort for coffee enthusiasts who want to take their brewing game to the next level.
Whether you prefer the inverted or regular AeroPress method, the key is to experiment and find what works best for you. With a little practice and patience, you’ll be brewing amazing coffee in no time!
FAQs
Is the inverted AeroPress method harder than the regular method?
While the inverted method may seem intimidating at first, it’s actually quite easy once you get the hang of it. The main challenge is flipping the AeroPress over onto your mug without making a mess, but this can be easily mastered with a bit of practice. It is a bit more involved than the regular AeroPress method, but it offers much more consistent (and better, in my opinion) results.
Can I use the inverted method with any type of coffee beans?
Yes, you can use the inverted AeroPress method with any type of coffee beans. However, keep in mind that different beans and roast levels may require slight adjustments to your brewing parameters, such as grind size and steeping time.
Do I need any special equipment to use the inverted method?
No, you don’t need any special equipment to use the inverted AeroPress method. All you need is a standard AeroPress, filters, coffee grounds, hot water, and a mug.
How do I avoid making a mess when flipping the AeroPress?
To avoid making a mess when flipping the AeroPress, make sure to create a tight seal between the filter cap and the brewing chamber before flipping. You may also want to practice flipping the AeroPress over the sink a few times until you get the hang of it. Make sure you push the plunger in far enough to avoid leaks. I usually seat the plunger halfway between the top of the AeroPress and the four marked on the outside of it.
Can I use the inverted method to make iced coffee?
Yes, you can use the inverted AeroPress method to make iced coffee. Simply brew your coffee as usual, but use a slightly higher coffee-to-water ratio to account for the dilution from the ice. Once your coffee is brewed, pour it over ice and enjoy!